Quantcast
Channel: Enjoy Indian Food
Viewing all 582 articles
Browse latest View live

Tilwali Bhakri - Sesame Millet Flatbread

$
0
0


A day before Sankrant is called "Bhogi". Tilwali Bhakri and Bhogichi Bhaaji combo is relished on this day. I wasn't sure if my "Tilwali Bhakri" would turn out okay, but it did! The roasted sesame seeds on the bhakri tasted delectable.

Tilwali Bhakri
Sesame Millet Flatbread
Ingredients
1 cup bajri/bajra/millet flour
hot water as needed to knead the dough

1 tsp white sesame seeds per bhakri
1 tsp bajri flour per bhakri, to dredge & pat

Suggested Accompaniment
Gul-Toop/Crushed Jaggery & Ghee/Clarified butter
&
Bhogichi Bhaaji

Method
1. Keep tawa/pan for heating.
2. Knead flour with hot water to make dough. Keep kneading till it no longer sticks to the hand.
3. Make about 6 uniform balls.
4. Spread spoonful each of sesame seeds and flour on the rolling board.
5. Place one dough ball on top and start patting till a circular disc is formed.
6. Place it on a hot tawa with sesame seeds part touching the pan.
7. Wet your hand and spread it on the bhakri (non-sesame part)
8. Flip and cook the other side.
9. Roast the non-sesame side on the flame.
10. Serve with jaggery, ghee and Bhogichi Bhaaji.

Note -
1. I got about 6 small sized bhakris


Print Page

Sankrant Special Recipes

Shepuche PoLe - Dill Dosa

$
0
0


I grow my own dill leaves in my veggie patch, yet I discovered something new. Well, you see, so far I had planted fennel seeds and when they grew the leaves, I called them dill and happily used in my recipes. Then two things happened. My MIL visited and she forgot a bag of "BaLantshep" that she got from India for my sister-in-law. Both my SIL and MIL told me to use it rather than mailing it. Well, I do know few recipes using "BaLantshep" but they are generally meant for lactating mothers. Anyways, I shoved the packet in the fridge and forgot about it. As summer approached, I saw the "Dill Seeds" at out local garden nursery and they were not fennel seeds but they were what I called "BaLantshep". Now I knew what to do with the packet I had stored in the fridge. Now, I use the dill seeds to grow shepu/dill/suwa and I use fennel seeds to grow oli badishep/fresh fennel seeds.

Shepuche PoLe
Dill Leaves Pancakes
Ingredients
1/2 cup urad daal
1 cup rice
1/2 tsp fenugreek seeds

salt to taste
1 1/2 tbsp grated jaggery or jaggery powder
1 cup chopped , fresh dill

Oil for frying

Suggested Accompaniment
Batatya Sukke

Method
1. Pick, rinse and soak urad daal, rice and fenugreek seeds in plenty of water overnight.
2. Drain and grind to a smooth batter.
3. Add salt and jaggery.
4. Cover and set aside in a warm place to ferment.
5. Add chopped dill, when ready to make these pancakes.
6. Heat a griddle or tawa.
7. Add a ladleful of batter to make thick pancakes.
8. Serve with batatya sukke.

Note-
1. If the batter is not fermented due to cold weather, you can add a pinch of baking soda just before making pancakes.
2. You can increase the amount of dill leaves if you like.
3. Use only fresh dill for this recipe. Fennel seeds or dill seeds will not work.
4. Due to addition of jaggery, these pancakes have a sweetish undertone. If you like you can increase the amount of jaggery to make it sweeter.


Print Page

Undhiyu - (1)

$
0
0


"Tum Gujrati log kitne cute hote hai ... par tum log ka khaana itna khatarnaak kyun hota hai ... Dhokla Faafda Handva Thepla ... aise lagta hai koi missiles hai...."

Remember Kareena Kapoor's dialogue from the film "3 Idiots"? Well, I of course agree completely with the very first senetence!!;-) As a food blogger,  when I hear these words, I do calculations in my mind - Dhokla - tick, Handva - tick, Thepla - tick, Khandvi - tick,  Faafda - not yet, Undhiyu - not yet! - what , I havent' blogged about Undhiyu yet? What kind of Gujarati daughter-in-law am I? Well, but to be honest, I have prolonged posting about Undhiyu because I do not get the right winter vegetables here. I had seen a frozen "Undhiyu vegetable" packet in the freezer section of Indian stores, but I was very disappointed with the result. Finally, I collected, the individually frozen Undhiyu vegetables and tried to recreate the recipe. During winter, you get beautiful Unhiyu vegetables in Mumbai. I had to be content with these frozen veggies.

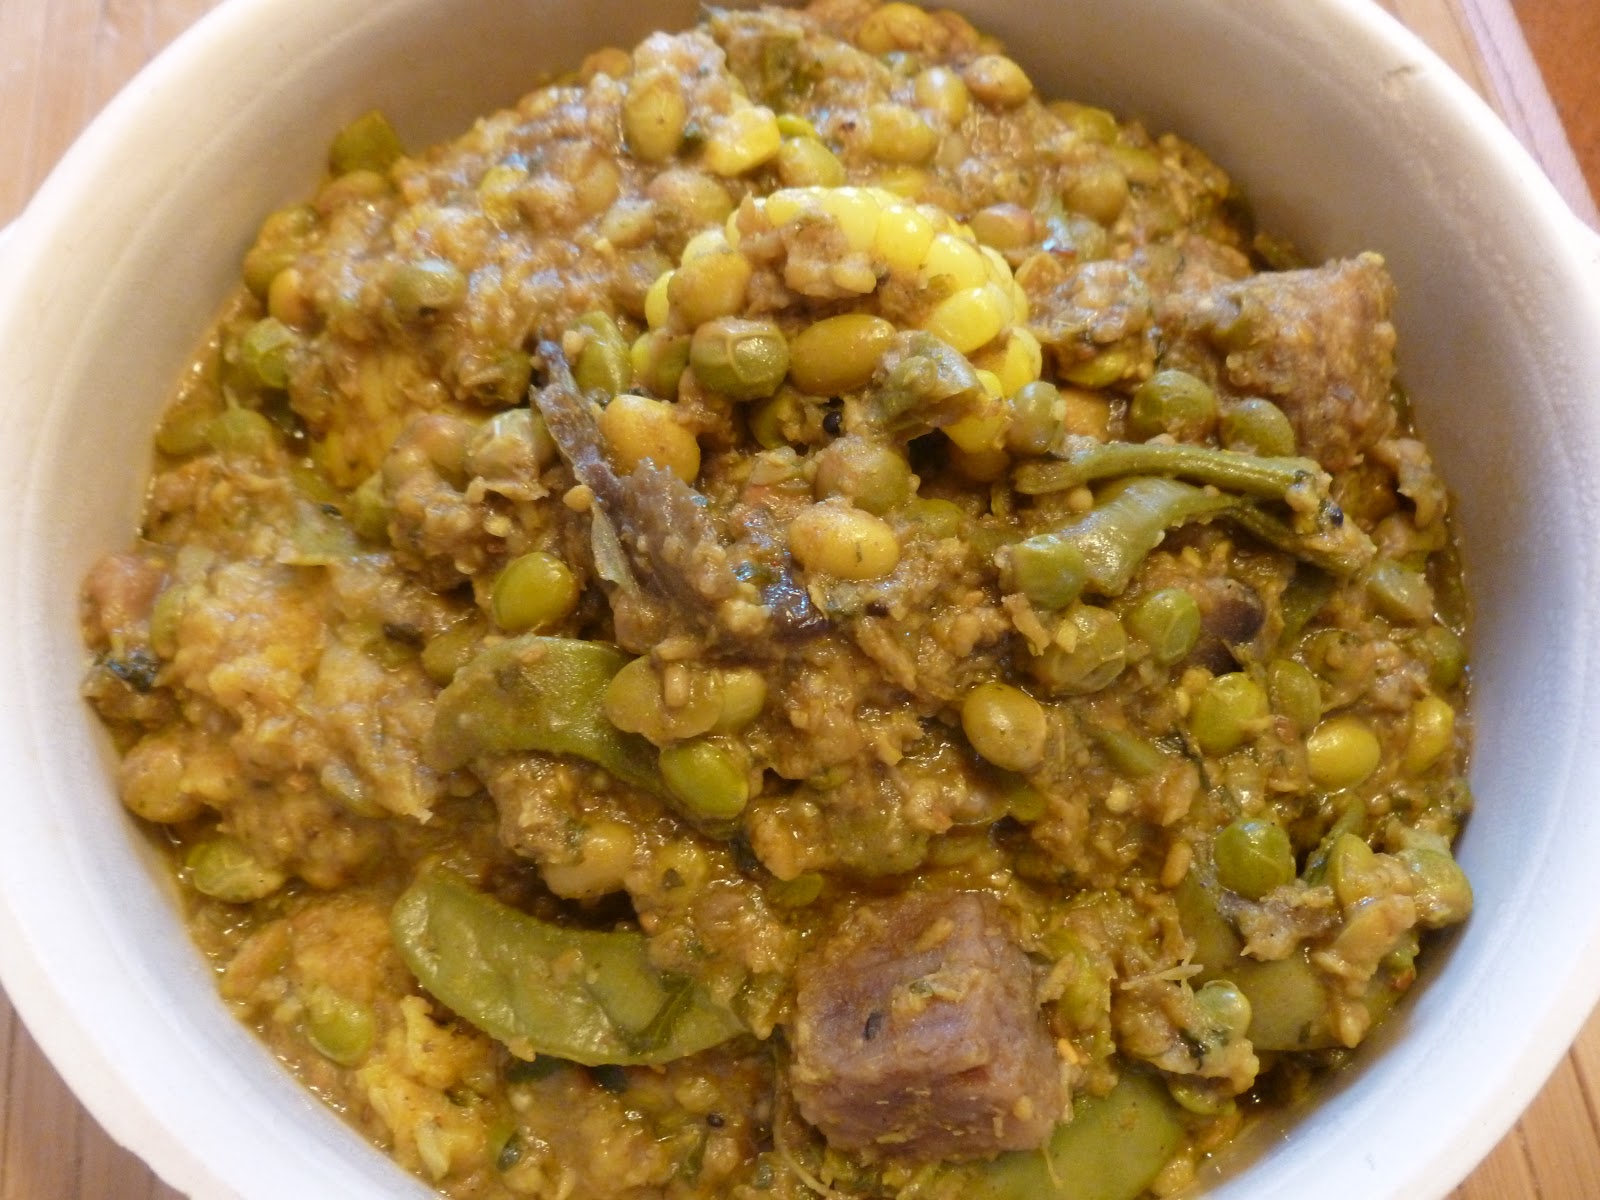
Another stumbling block for not blogging Undhiyu yet was that I have several versions of the family recipe. So after gathering the correct ingredients, I decided to make Undhiyu - 1.


Undhiyu
Winter Special Gujarati Mixed Vegetables
Ingredients
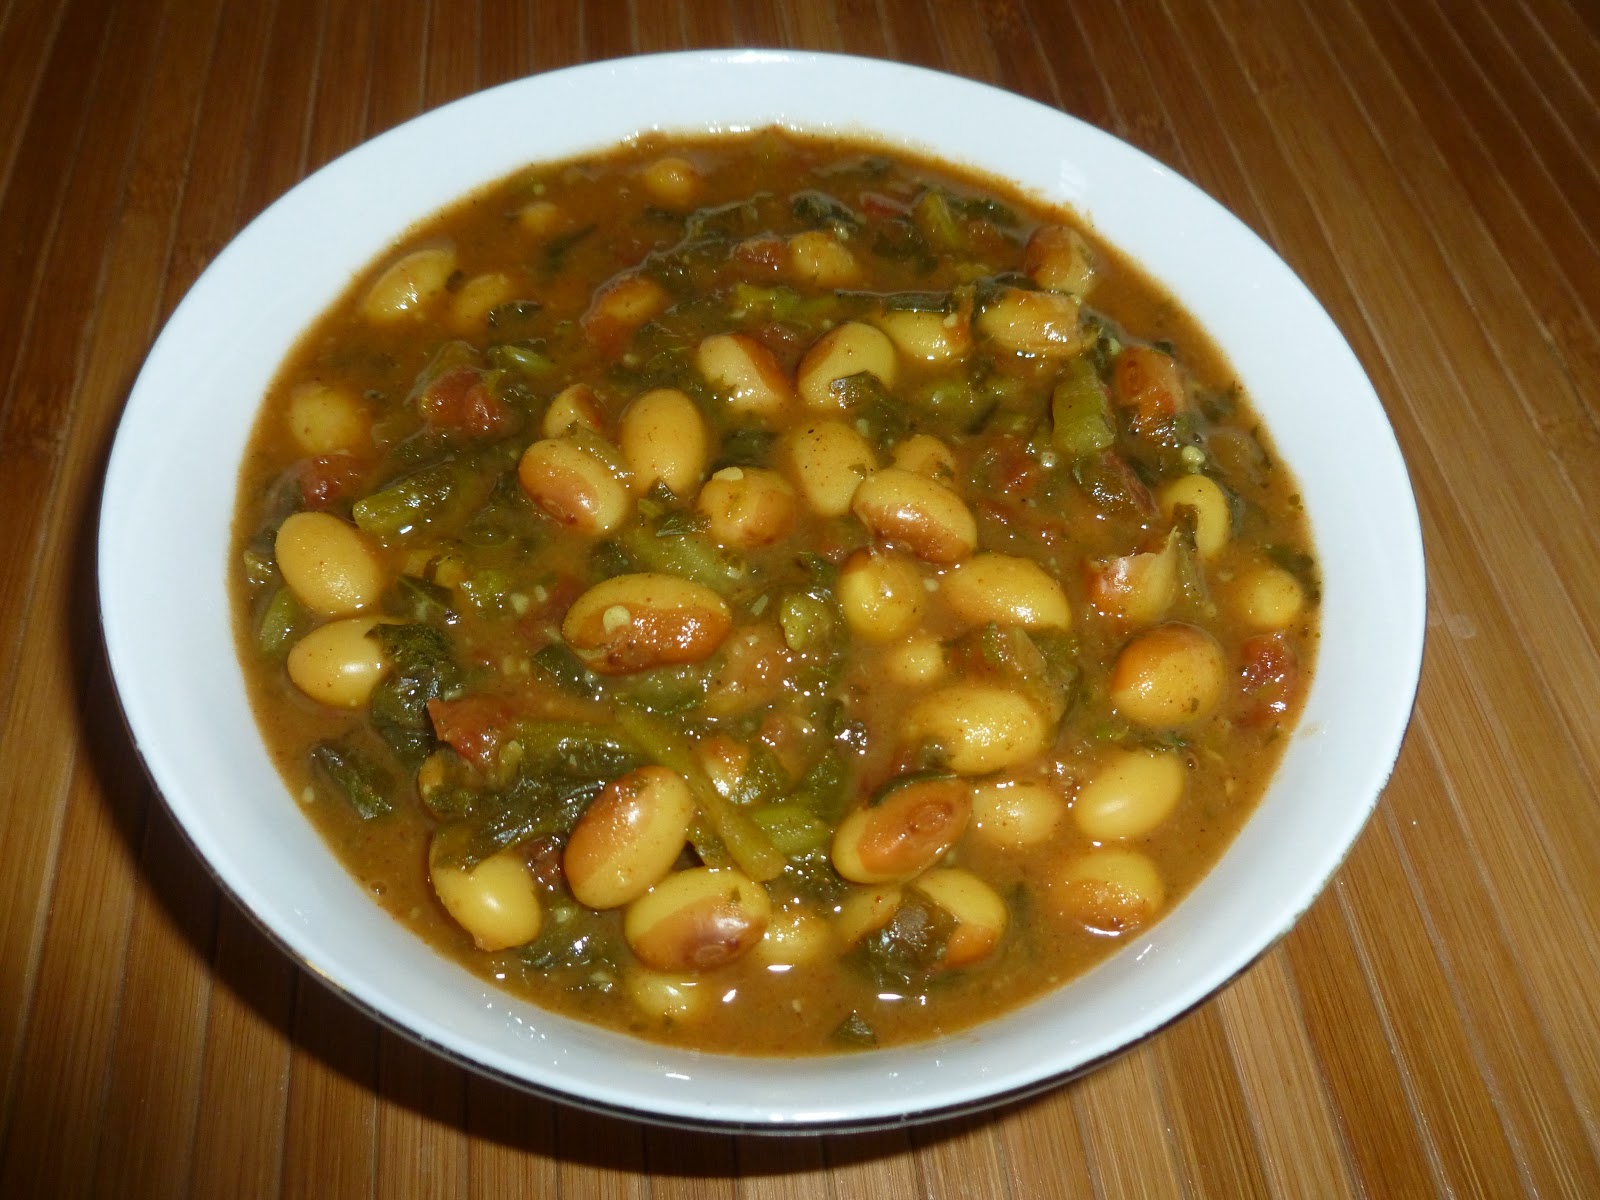
1 packet Surti Papdi, whole (Frozen)
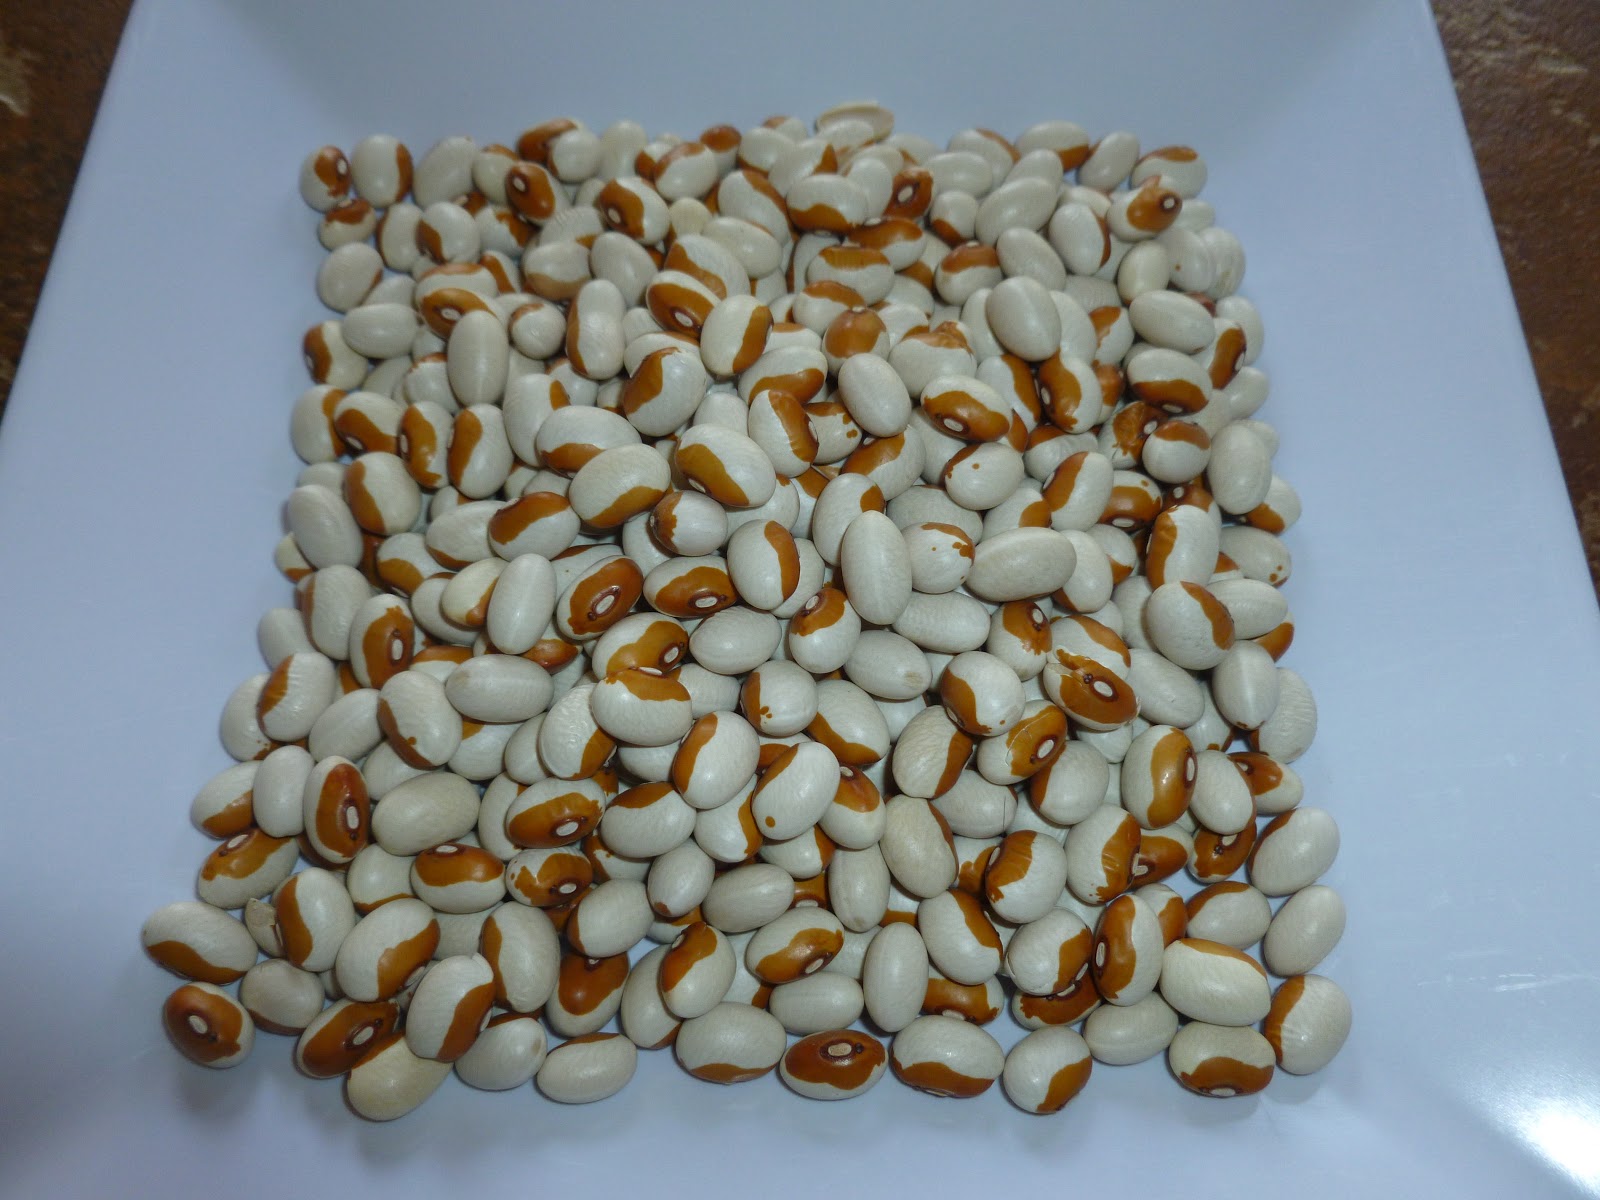
1 packet Surti Papdi, Lilva/beans (frozen)
1 packet Toovar Lilva (Frozen)
1 packet ratalu (Frozen)
1 big corn on cob, cut into 6 chunks
5-6 small eggplants
5-6 small potatoes
1 ripe yet firm banana, cut into 6 thick rounds
1 1/2 cups Methi Muthiya

*Grind/Crumble coarsely
1/2 cup sev

*Grind to a coarse paste
1 bunch cilantro
4 - 5 garlic cloves - preferably with greens
2" ginger, peeled
4-5 green chilies
salt to taste
1 tbsp sugar
1 tbsp lemon juice
1 tbsp Gujarati Garam Masala
1 tbsp coriander-cumin powder/dhana jiru
1 tsp mild chili powder

Stuffing
1 cup freshly scraped coconut
1/2 cup cilantro, chopped
1 tbsp kasoori methi
*Ground paste
* Coarsely crumbled Sev

Tempering
1 tbsp oil
1/2 tsp owa/ajmo/ajwain
1 tbsp white sesame seeds
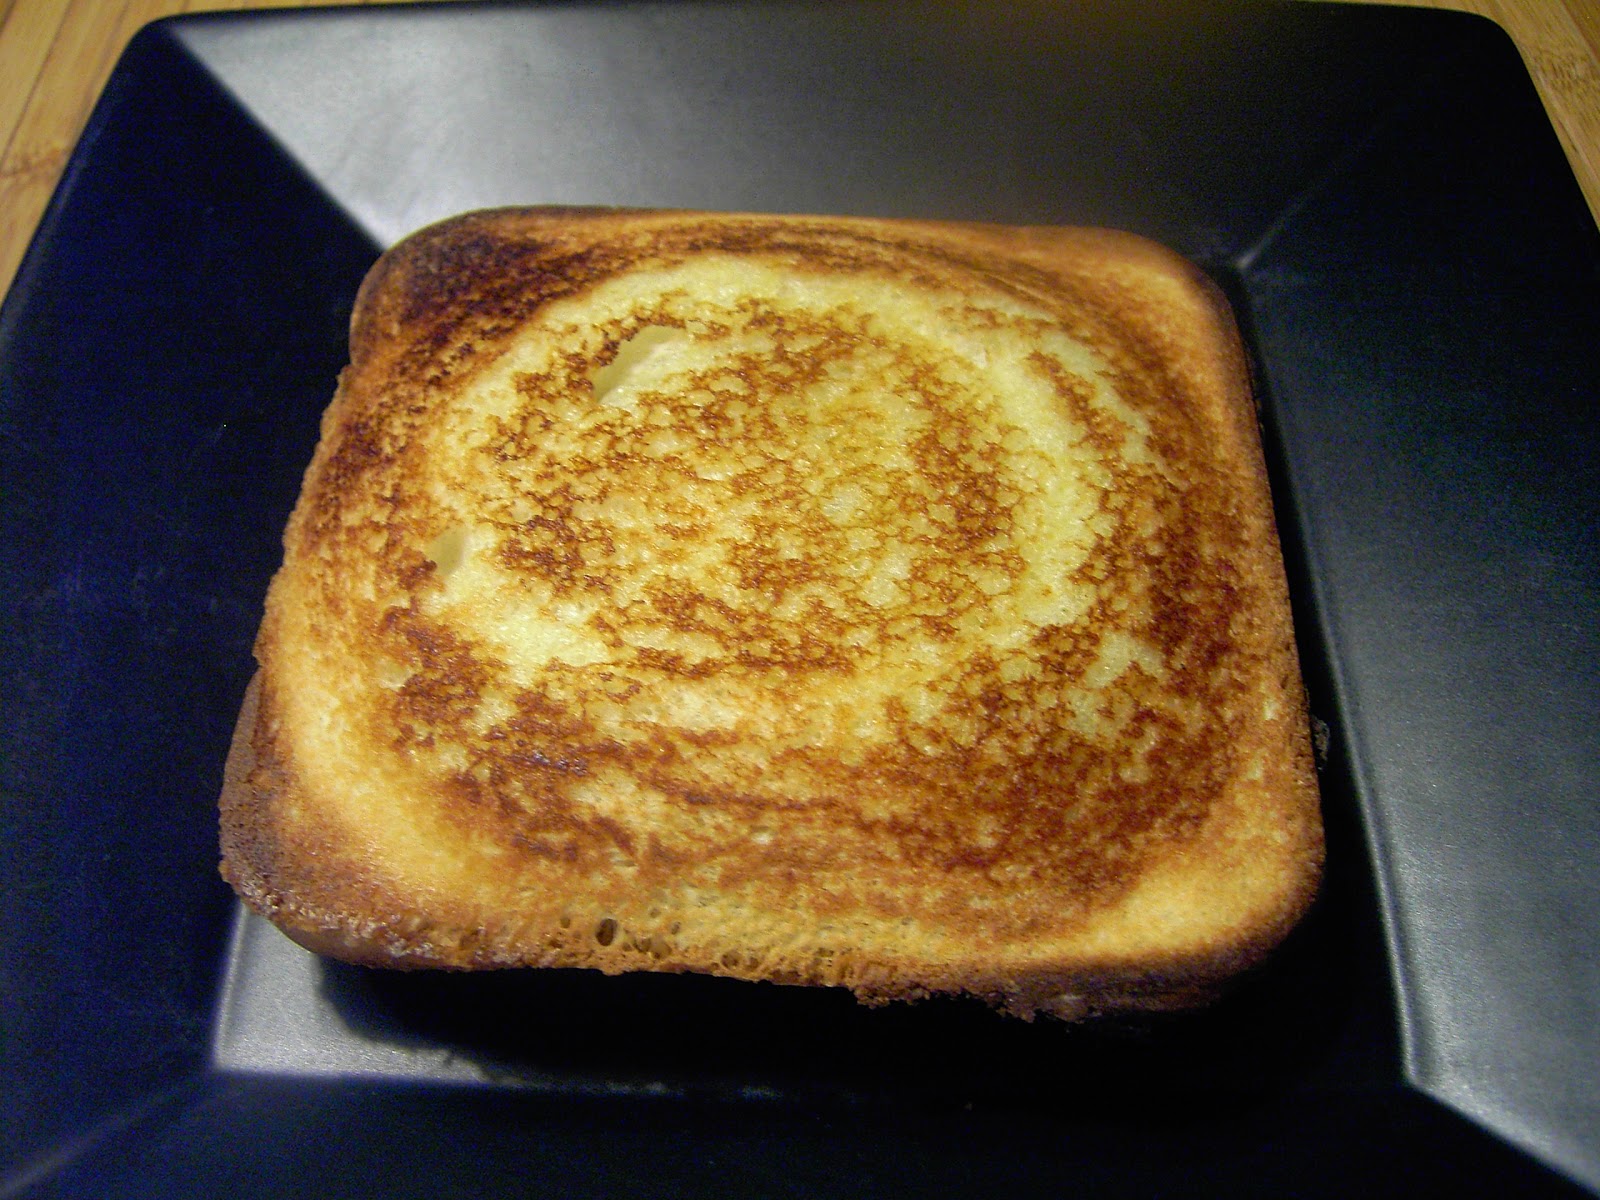
Suggested Accompaniment
Puri
Aamras/Keri nu Rus

Method
0. Rinse/Thaw vegetables. Cut a cross on each potato and eggplant and banana. Stuff the masala stuffing inside potatoes, eggplant and banana. Keep the remaining stuffing.
1. Heat a pressure cooker. Add oil and ajwain/Ajmo/Owa and sesame seeds.
2. As they stat spluttering, place corn, stuffed eggplants and potatoes. On top of them place the remaining vegetables. Do not add bananas and muthiyas at this point. Sprinkle all the remaining stuffing and 2 cups water.
3. Pressure cook for 2 whistles.
4. Now add muthiyas and bananas.
5. Cover and let it cook for 1 hour or so.

Note -
1. Traditionally lot more oil is added for cooking this winter special delicacy.
2. If possible, use goradu/konfal/kand mul which is a purple colored Indian root vegetable.


Print Page

Methi chi UsaL - Fenugreek Seeds Stir Fry with Moong Daal

$
0
0
 

Although, I thought I had devoured everything that my best friend's mom cooked, there still are many recipes that I haven't yet tried. My mom shared this recipe on the phone that "Kaku" had made. I found it very interesting and healthy so I had to try it myself. I was surprised to see that I really liked the unique combination.

Methichi UsaL - (Moog Daal Ghalun)
मेथीची  उसळ  - मूग डाळ  घालून 
Fenugreek Seeds & Yellow Moong Daal
Ingredients
1/4 cup dry fenugreek seeds, Soak and sprout following information here
1/4 cup yellow moongdaal, soaked in water for 1 hour
salt to taste
1/2 tbsp jaggery
1 tsp chili powder

Tempering
1/2 tbsp oil
1/2 tsp mustard seeds
1/4 tsp asafoetida
1/2 tsp turmeric powder
1/3 cup chopped onion

Garnish
1 tbsp chopped cilantro
1 tbsp grated coconut (Optional)

Method
1. Soak moong daal an hour before making this usaL.
2. Heat oil in a saucepan. Add the tempering ingredients and saute till onion is soft.
3. Add moong daal and fenugreek sprouts. Add 1/4 cup water. Cover with a lid. Place some water on top and let it cook till soft, making sure that moong daal is not a mush.
4. Add chili power, jaggery and salt.
5. Simmer for 5 minutes.
6. Garnish with cilantro and coconut - if using

Note -
1. Fenugreek sprouts can also be frozen as instructed here.
2. This curry is little on the sweetish side to balance the bitter taste of the fenugreek sprouts.
3. 1/4 dry fenugreek seeds give about scant 1 cup of fenugreek sprouts
4. I have already blogged about another version of Methi with Matki.


Print Page

Cashew Quinoa

$
0
0
 
I like to include quinoa at least once a week for our family dinners. Apart from being a nutritional powerhouse, this is put together fairly quickly - especially if you have a batch of cooked quinoa in your fridge.
 
Note - I do not know what quinoa is called in any of the Indian languages. I doubt if there is any word since quinoa originated in South America. Also, I do not know if quinoa is available in Mumbai or any part of India. I buy "Organic Quinoa" from Costco.
 
Cashew Quinoa
Ingredients
2 cups raw quinoa, cooked with double amount of water
1/2 red onion, chopped
1 lemon, freshly squeezed
3-4 kirby cucumbers, peeled & chopped
2 tomatoes, chopped
1/4 cup raisins
1/4 cup roasted, salty cashews, roughly chopped
salt to taste
2 tbsp cilantro or 1/2 cup shredded lettuce
 
Method
1. Cook quinoa according to the instructions on the packet. Set aside to cool down.
2. Chop all the veggies.
3. Stir together and serve.
 
Note -
1. If you have cooked quinoa in the fridge, bring it to the room temperature before proceeding.


Print Page

Kolhapuri Egg Curry

$
0
0
 
My friend makes this curry with a very dry gravy so she can serve it with "Ghadichi PoLi". I add more water to make "rassa" or a thin gravy and I love to serve it with sourdough bread.

Kolhapuri Anda Masala
Kolhapuri Egg Curry
Ingredients
6 Eggs
6 Baby Potatoes
salt to taste

Roast* and Grind
1/2 cup fresh coconut*
2 1/2 tbsp white sesame seeds/Teel*
1/4 cup sliced onion*
4-5 cloves garlic*
1" ginger - do not roast
1/4 cup roughly chopped cilantro - do not roast

Tempering
1 tbsp oil
1/2 tsp turmeric powder
2 tbsp finely chopped onion

You will also need
1 tsp mild chili powder
1 tsp to 1 tbsp Kolhapuri Masala

Garnish
1 tbsp minced cilantro/coriander leaves

Suggested Accompaniment
Lemon wedges
Salad
Chapati/bread or Rice

Method
1. Hard-boil eggs. Peel and cut them into halves.
2. Boil baby potatoes. Peel and cut them into halves.
3. Roast  coconut, onion, sesame seeds and garlic one after the other adding oil as needed. You will not need any oil for roasting coconut. Do not roast ginger and cilantro
4. Grind roasted ingredients with chili powder and Kolhapuri Masala.
5. Heat oil in a saucepan. Add onion and turmeric powder. Stir fry till onion is soft.
6. Add ground masala and saute for 10 minutes.
7. Add 2 cups of water and salt to taste. Bring to boil.
8. As the curry boils, switch gas to low and add eggs, potato gently.
9. Let the curry simmer for at least 10 minutes or till desired consistency is reached.
10. Garnish with cilantro -just before serving.

Note -
1. This curry can also be made as a very dry curry. It goes by the name "Masala Anda". If making dry/thick curry, serve it with Ghadichi PoLi. If making as a currry with thin consistency, serve with pav/bread. Crusty ciabatta goes really well with the thin curry.


Print Page

Pedvya Sukke (2) - Sardine Curry

$
0
0
Pedvyache Suke(2) - Sardine Curry
 
We call Sardines as Pedve/Pedvay in Marathi. Another variety of sardines also goes by the name "Tarle/Taarlay". I think these names differ based on the size of the sardines. Sometimes, I get sardines at Whole foods or Chinese Market.
 
If you ever visit San Diego, stop by "Imperial Beach" in the evening and you will see many people fishing sardines by the pier.
 
Pedvya Sukke - (2)[Kotambir Menti]
Sardine Curry
Ingredients
6 medium sardines, cleaned and cut into two
salt
turmeric
 
Few drops of coconut oil, as needed
 
Grind to a coarse paste
1 cup fresh coconut
1 1/2 tbsp coriander seeds, roasted
1/4 tsp fenugreek seeds, roasted
1 tsp tamarind pulp, or to taste
10-12 byadgi chilies, roasted
 
Suggested accompaniment
Plain rice
 
Method
1. Clean & rinse the sardines. Cut into halves. Marinate with salt and turmeric powder. Set aside till ready to use.
2. Roast coriander and fenugreek seeds separately. Adding a few drops of coconut oil, roast byadgi chilies. Grind all the roasted ingredients with coconut and tamarind, adding water as need. It should be a coarse paste. Do not add too much water while grinding.
3. Place sardines in a single layer in a wide saucapan (called lagaDi in Marathi). Add masala paste and 1/4 cup water. Adjust salt. Bring to boil.
4. Let it simmer till the sardines are cooked and the curry has a thickish consistency.
5. Drizzle with a few drops of coconut oil.
 
Note -
1. Please use fresh sardines for this recipe. I am not sure how the sardines in the can may work.
2. If sardines are smaller, you may leave them whole.
3. This curry should have a thick consistency. But if you would like to have thin consistency, follow the same method but grind the masala to a fine paste before adding it to the sardines. Adjust water per desired consistency.


An unknown fisherman posed graciously for me while he was busy catching some fresh sardines for his supper at San Diego Pier.


Print Page

Khata Mag

$
0
0
A simple curry made with sour yogurt and moong beans.

Khata Mag
Sour Moong Beans curry
Ingredients
1 cup raw moong beans, soaked overnight
salt to taste

Whisk together
1 cup sour yogurt
1 cup water
2 tbsp besan/chickpea flour
1 tsp coriander-cumin powder/dhana jiru

Tempering
1 tsp oil
1/2 tsp mustard seeds
1/2 tsp asafoetida
1/2 tsp turmeric powder
1 sprig curry leaves, torn
1 tsp green chili - ginger paste

Method
0. Pressure cook drained moong beans for 1 or 2 whistle. Let them cool down completely.
1. Heat oil in a saucepan. Add all the ingredients for tempering.
2. As they splutter, add mung beans. Stir for 1 minute.
3. Add yogurt mixture. Add salt to taste. Bring to boil while stirring constantly.
4. As the curry comes to slow boil, switch the gas to low and let it simmer.


Note -
1. As the name suggests, this curry needs sour yogurt. I do not get sour yogurt here. So I serve with curry along with lemon wedges. So everyone can squeeze some fresh lemon juice to get the desired sourness.

Grilled Cheese Sandwich

$
0
0
 
 
Among Gudiya's most favorite foods, probably grilled cheese sandwich (along with Mac n' Cheese) tops the list. My mom used to add a little onion and chili for flavor. I also added some grated cabbage and carrot to sneak in some veggies.
 
Grilled Cheese Sandwich
Ingredients
4 Whole Wheat or White Sandwich Bread Slices
Butter - preferably Amul for that magical Childhood taste;-)
 
Stuffing
2 tbsp grated cheese such as Mozzarella (Again, use Amul cheese for nostalgia!)
1 tbsp finely grated cabbage
1 tbsp finely grated carrot
1/2 tbsp minched red onion (optional)
1 green chili, minced (optional)
1/2 tbsp minced cilantro
 
Method
1. Butter two slices of breads.
2. Carefully, place the cheese stuffing.
3. Place in your sandwich maker so that the buttered sides are outside.
4. Toast according to the instructions.
 
Note -
1. This is a very fuss free recipe. Use your own proportions for vegetables.
2. Serve with creamy tomato soup.
Old Faithful!!:-)

These days I use my electrical sandwich maker when making those toasted/grilled sandwiches. Twin sandwiches get ready at the same time with a diagonal perforation. But still, a glance at my old sandwich maker takes me back to my childhood. Mom used to make many grilled sandwiches using the above sandwich maker. (eggs, kheema, cheese, veggies, potato). My most favorite used to be the one with batatavada stuffing.

Yellow Eyed Peas Curry - Peele Lobiya

$
0
0


I chanced upon a wonderful stall (Roncho Gordo Heirloom Beans) while taking a stroll in the San Francisco Farmers' Market. This stall had very unusual and exotic beans. Yellow Eyed Peas were something I had never heard or seen before. So I decide to buy them. I made a Punjabi style "Lobiya" curry. They were firmer than our good old black eyed peas but they tasted good nonetheless.

Peele Lobiya
Yellow Eyed Peas Curry
Ingredients
1 cup dry yellow eyed peas, soak overnight
1 1/2 tsp ginger-garlic paste

salt to taste
1 tbsp coriander-cumin powder
1 tsp chili powder
1/2 tsp garam masala

1 cup shredded spinach (fresh or frozen) - Optional

Grind to a fine paste
1 1/2 cups roughly chopped onion
3/4 cups roughly chopped tomatoes

Tempering
1/2 tbsp oil
1/2 tsp cumin
1/4 tsp asafoetida
1/2 tsp turmeric powder
1 small piece of cinnamon
1/4 cup minced onion

Garnish
1 tbsp minced cilantro

Suggested Accompaniment
Paratha or Jeera Rice
and
Salad and lemon wedges

Method
1. Pressure cook yellow eyed peas using adequate water and ginger garlic paste. Set aside.
2. Grind onion-tomato paste.
3. Heat oil in a saucepan. Add the spices. As they splutter, add onion and saute till it's soft.
4. Now, add onion-tomato paste. Saute for 20 - 30 minutes. Add spinach- if using.
5. Add coriander-cumin powder, chili powder, garam masala.
6. Add cooked yellow eyed peas, salt to taste and water as needed.
7. Bring to boil. Let it simmer for 15 minutes
8. Garnish with cilantro and serve with lemon wedge on the side.

Note -
1. Addition of spinach is optional. You can omit it if you don't like.


Print Page

Christmas Beans Curry

$
0
0


When I was growing up in Mumbai, mom used to make a delicious curry with "Double Beans". She would get fresh or dry variety. I loved them not just because they were delicious or they were huge in size but because they had a beautiful purple, pink hues on them. They were so stunning to look at.

Whenever I visit Mumbai these days, I can't find these cherished beans. However, I saw something similar - maybe a distant relative of this childhood favorite of mine - at Rancho Gordo Heirloom Beans at San Francisco Farmers Market. These beans were called "Christmas Beans". I decided to use the same recipe that - I think - my maushi had developed using Marathi and Punjabi ingredients.

Gudiya loved this curry. I couldn't tell if she actually loved these beans due to their delicious taste or due to the word "Christmas" in them.

Christmas Beans Curry
Ingredients
1 cup dry Christmas Beans or Indian Double Beans, soak overnight [They get huge so use a big bowl and use plenty of water to soak]
1 or 2 potatoes, peeled and chopped

salt to taste
1 tbsp coriander powder
1 tsp mild chili powder
1 tsp cumin powder
1/2 tsp garam masala
1 tsp jaggery

Grind to a fine paste
1 cup cilantro
15 fresh mint leaves
3-4 green chilies, more or less per desired heat
3-4 cloves of garlic
1 1/2" ginger, peeled

Tempering
1 tbsp oil
1/2 tsp turmeric powder
1 cup minced onion
1/2 cup minced tomatoes


Method
1. Pressure cook beans with potatoes and set aside.
2. Heat oil in a saucepan.
3. Add turmeric powder and onion. Saute till onion is soft.
4. Add tomatoes. Saute till they are pulpy.
5. Now add mint paste. Saute for 10-12 minutes.
6. Add all powders and salt.
7. Add cooked beans & potatoes along with the cooking liquid.
8. Add jaggery. Bring to boil.
9. Simmer for 10 minutes.

Note -
1. Fresh mint is an important ingredient for this recipe. Do not skip it.

 
Rancho Gordo Heirloom Beans Stall at San Francisco Farmers Market

Print Page

Narangi ni Basundi

$
0
0
This is a simple Gujarati dessert. I have tasted four different types of fruity basundis - Orange Basundi, Pineapple Basundi, Strawberry Basundi and Dry Fruit Basundi. Each basundi adds a unique flavor of the fruit du jour. It's delicious. Just make sure to serve it chilled.
This is how I make it -

Narangi ni Basundi(Serves 6- 8)
Ingredients
1 litre whole milk (Preferably organic)
1 can sweetened condensed milk
1 can evaporated milk
1/2 tsp freshly ground cardamom powder
few threads of saffron + 1 tbsp milk
1 ripe orange
1 tsp sugar
1/4 tsp orange essence (Optional)
few almond / pistachio slivers

Method
1. Boil milk. Lower the flame, let it simmer for about half an hour.
2. Add condensed milk, evaporated milk. Simmer.
3. Keep saffron threads in a spoon and roast them quickly on a low flame . Put roasted saffron in 1 tbsp milk to get a vibrant yellow color. Add the saffron milk in the basundi.
4. Add cardamom. Switch off the gas. Let the basundi cool down completely.
5. Meanwhile, peel the orange. Remove the pith, seeds. We will use only inside orange segments. Chop them. Add the sugar. Keep it in the fridge covered.
6. Add Basundi to a serving bowl. Keep in the fridge. Make sure it's completely chilled.
7. Just before serving, add chopped oranges, orange essence - if using, almonds and pistachios.

Note -
Do not add orange in hot basundi, else the milk will curdle. This basundi has to be completely chilled. After putting orange basundi in a serving bowl, remember to serve immediately.


Happy RepublicDay, India!
 
जय जय जय , जय हे
 

Chicken Pudinewala

$
0
0
Chicken Pudinewala


My mom created this recipe during one of her visits while I had a crazy work day on Sunday. We had lots of mint and she used whatever spices she could find. This curry tasted delicious. When I asked her what's for dinner on phone from work, she said - chicken curry. I told her after tasting the curry, that just chicken curry doesn't do justice to this delicious creation so I named it "chicken pudinewala"!


Chicken Pudinewala
Minty Chicken Curry
Ingredients
1 lb chicken tenderloins, cut into small pieces
Marinate with 1/2 of ground green paste*
1/3 cup yogurt
1/2 tsp turmeric powder

Grind to a fine paste*
1/3 cup mint leaves
4-6 garlic cloves
2" ginger
1 cup cilantro
1 tsp lemon juice

Tempering
1 tbsp oil
1 1/2 cup finely chopped onions
3/4 cup finely chopped tomatoes
1/2 of remaining green paste

Spices
1/2 tsp Clove powder
1/8 tsp Nutmeg Powder
2 tsp Coriander Powder
1 tsp Kachcha Masala
2 tsp Garam Masala
1/4 tsp Ginger Powder
2 tsp paprika
1/2 tsp turmeric powder

You will also need
1 cup coconut milk
salt to taste

Garnish
5-7 mint leaves, cut into thin ribbons

Method
1. Grind green paste using mint, cilantro, lemon juice, ginger & garlic.
2. Marinate chicken with half of about paste, turmeric powder and yogurt. Set aside in the fridge till ready to use at least for 1/2 hour.
3. Heat oil in a heavy bottomed saucepan. Add onions. Saute for 5 minutes. Add remaining green paste. Saute for 5 minutes. Now add tomatoes. Saute again till tomatoes are mushy.
4. Now add marinated chicken. Saute for 5 minutes. Add all the spices. Saute again for 5 more minutes.
5. Add 1 cup water. Cover and let it cook till chicken is soft. Add more water if needed.
6. Add salt to taste. Simmer for 5 minutes. Add coconut milk. Simmer till desired consistency is reached.
7. Garnish with mint ribbons.

Note -
1. Use fresh mint for this recipe.

Gardening Tip -
When you buy fresh mint from the grocery stores (I buy it from the local Indian stores or Farmers market as it's cheaper than the supermarkets), immerse the mint stems in a glass of water. In about 2-3 weeks, the stems will grow roots. You can plant those stems and grow your own mint. You can actually skip this step and plant directly into the soil. But in my opinion, water immersion method has a higher chance of survival.


Print Page

Vegetable Kadhi

$
0
0

This kadhi is flavored with mixed vegetables. My MIL adds cauliflower florets, potatoes, carrots, green beans. Make sure that they are cut in small dice.


Vegetable Kadhi
Buttermilk Soup with Mixed Vegetables
Ingredients
Whisk first 3 ingredients -
4 cups thick buttermilk
2 tbsp besan/chickpea flour
1/2 tsp turmeric powder

2 cups mixed vegetables (cauliflower, carrots, green beans, potatoes)
1/2 tbsp jaggery
salt to taste

Tempering
2 tsp oil/ghee
1/2 tsp mustard seeds
1/2 tsp cumin seeds
1/2 tsp turmeric powder
2-3 cloves
1 small piece of cinnamon
2-3 red boriya chilies
1 sprig curry leaves, torn
1 tbsp ginger-green chili paste

Method
1. Heat oil or ghee in a heavy bottomed saucepan. Add all the spices. As they splutter, add ginger-chili paste.
2. Saute for 1 minute. Add diced vegetables.
3. Stir fry for 2 minutes. Add 2 tbsp water and let it cook till the veggies are half-cooked.
4. Add whisked buttermilk, salt and jaggery.
5. Keep on stirring while it comes to a rapid boil.
6. Switch the gas to low. Simmer while stirring for about 5 minutes.
7. Serve with plain rice or khichdi.

Note -
1. Adjust ginger-chili paste based on the desired spice level.
2. Boriya chilies are traditionally used for tempering. You can use any dried, red chilies of your choice.


Ravyacha Cake - Eggless Semolina Cake

$
0
0

Ravyacha Cake is one of the most commonly made eggless cake in the Maharashtrian kitchens. It has a typical "home baked" quality to it, which I enjoy the most. I have already blogged about variations of this cake - Kelyacha Dhondus, Cucumber Dhondus.

My aunt used to bake this cake in her Nirlep pan. Later she started baking it in the circular oven that was very popular in India in 80s. Whenever I bake this cake today, it takes me to those lovely childhood days.

Ravyacha Cake
Eggless Semolina Cake
Ingredients
2 cups rava/semolina
1 cup milk
1 cup yogurt
1 tsp clarified butter/ghee
1 - 1 1/2 cup sugar
1/2 tsp baking soda
A pinch of salt (optional)

Flavors -
Few Drops of Vanilla essence
or
1/2 tsp cardamom powder + few strands of saffron
or
1 tbsp Doodh Masala


Method
1. Mix all the ingredients and cover and set aside for at least 1 - 2 hours.
2. Grease a baking pan. Pour th mixture.
3. Preheat oven 350F
4. Bake for 30 -35 minutes or till the cake is evenly baked.
5. Let it cool down. Cut into squares and enjoy!


Note
1. You can increase the amount of sugar based on your preference.
2. For flavor, you can use cardamom powder or vanilla essence/extract or doodh masala.
3. I used fine rava for this cake.


Print Page

Baked Shankarpale

$
0
0

I got inspired to "bake" the shankarpali instead of deep frying them after seeing Sanjeev Kapoor's recipe for the same. I thought my grandmother's recipe of boiling milk, sugar, salt would work better with baking. I was pleasantly surprised to see the result. Since Gudiya loves these "Shankarpali crackers", I make these even when Diwali is long over.

Baked Shankarpale
Indian Diamond Crackers
Ingredients
1/2 cup peanut oil
1/2 cup whole/full fat milk
1/2 - 2/3 cup sugar
1/2 tsp salt

Approx. 2 1/4 - 2 1/2 cup all purpose flour/Whole Wheat Pastry Flour
1/2 - 1 tsp vanilla extract (optional)

Method
1. In a saucepan, mix oil, milk, sugar and salt. Bring to simmering boil.
2. Let it cool down to the room temperature.
3. Add all purpose flour as needed and vanilla extract - if using. Knead into a dough.
4. Cover and let it rest for 2 hours.
5. Preheat oven 350F
6. Make 5 uniform balls.
7. Roll into a flat disc.
8. Cut into diamonds or squares using a butter knife or a shankarpale cutter.

9. Keep on a baking sheet in a single layer. Bake each batch for about 9 minutes.
10. Take it out and flip all the crackers as quickly as you can.
11. Bake for additional 6 - 7 minutes.
12. Take out and keep in a single layer.
13. Store in an airtight container as it cools down completely.

Note -
1. As you take the shankarpali out, they will be soft to touch. Let them cool down completely and then they will be crispy.
2. I add vanilla extract but this is purely optional.
3. You can use whole wheat pastry flour instead of all purpose flour.
4. Traditionally, the same recipe is followed to deep fry the crackers instead of baking them.
5. I , sometimes use my breadmaker to knead the shankarpali dough.
6. You will need approximately 2 1/4 - 2 1/2 cup all purpose flour. Take as needed to knead the dough.

Credits
www.sanjeevkapoor.com


Print Page

Pudiye Nonche - 1

$
0
0
 
 "Pudiye Nonche" can be translated as the pickle made from powders. This unique South Canara pickle needs the pickle masala to be made from scratch. I make this pickle powder ready and store in a clean, dry glass bottle. I later use this pickle powder as needed. Traditionally, the porportions given below are for one time pickle making.
 
Pudiye Nonche - 1
Raw Mango Pickle
Ingredients
50 byadgi chilies
1/4 cup black mustard seeds
1 tbsp asafoetida
1 tsp fenugreek seeds
1 tsp turmeric powder
1/4 cup salt
 
Oil as needed to roast
 
Method
1. Roast byadgi chilies in a spoonful of oil. Set aside to cool down.
2. Roast all the remaining ingredients  separately. We even need to roast salt.
3. After the ingredients are cooled to the room temperature, powder them.
4. Now rinse, dry 1 raw mango. Cut into very small pieces.
5. Mix in pickle powder as needed. {You will not need all the pickle powder}
6. Let it marinate for few hours.
7. Serve as an accompaniment
 
Note -
1. Store in the refrigerator.
2. Traditionally, dried turmeric root (haLkunDa) is used instead of the turmeric powder.
3. Traditionally, each ingredient is roasted separately and powdered separately and then mixed together.


Print Page

Kandya Batatyachi Bhaaji - Onion & Potato stir fry

$
0
0


Mom used to make this simple bhaaji for lunchbox (dabba) sometimes. I used to look forward to this bhaaji. But once my lunchbox days in Mumbai were over, I hardly ate this bhaaji again. Just the other day, I suddenly remembered this bhaaji. So decided to make it myself. This bhaaji also makes a wonderful filling for the toasted sandwiches.

Kandya-Batatyachi Bhaaji
Onion-Potato Stir Fry
Ingredients
6-7 medium potatoes, peeled and cut into small pieces
2 medium onions, peeled & chopped
1 tsp chili powder
salt to taste
1/2 tsp sugar

Tempering
2 1/2 tbsp oil
1/2 tsp turmeric powder

Method
1. Heat oil in a heavy bottomed saucepan. Add onion and saute till it is transparent. Add turmeric powder.
2. Add potatoes. and saute for 2-3 minutes.
3. Cover with a lid and let it cook on the lowest heat for about 25 minutes.
4. Add chili powder, salt, sugar and cover again and cook on the lowest heat for about 20 or so more minutes or till the potatoes are cooked.

Note -
1. You can add some pav bhaaji masala, Kumta Masala or Garam Masala to enhance the flavor of this basic bhaaji.
2. This proportion serves 4-6 people.


Print Page

Date & Walnut Pudding

$
0
0
 
Dates are used as a natural sweetener for this pudding. Try it and you won't miss sugar.
 
Date & Walnut Pudding
Ingredients
1/3 cup Medjool Dates approx 7 - 9, deseeded
2 cups milk
2 tbsp walnuts
1 tbsp cocoa powder
few drops of vanilla extract/essence
1 tbsp or 1 envelope Knox gelatin
 
Method
1. Soak dates in 1 cup milk for about 4-5 hours.
2. Grind dates & milk mixture with walnuts, cocoa powder and vanilla extract.
3. Boil remaining 1 cup milk.
4. Pour the boiling milk over unflavored gelatin powder. Add date-milk mixture and whisk till there are no lumps of gelatin.
5. Pour in 4 serving bowls. Refrigerate and let it set for about 2 hours.
6. Serve chilled.
 
Note -
1. Use full fat milk for richer taste.
2. For sweeter taste, use 2 tbsp - 1/4 cup sugar or per your preference. In that case, grind it with date-milk mixture.


Print Page
Viewing all 582 articles
Browse latest View live